Snowshoeing is a great way to get outside in the winter!
Like any other activity, you can be thrifty and find an old pair of snowshoes from a yard sale or go all out and buy all the newest equipment and cold weather clothing from a name brand.
Whatever you decide, the important thing is to get out and enjoy the outdoors in the winter!
Snowshoeing Tips
For your first few times, I would suggest you rent equipment a few times from somewhere like REI before buying. You can also check where you are going to go and see if there are any snowshoe rentals available.
You may go out and decide that snowshoeing is not for you and then you will be trying to sell all your equipment in a yard sale for pennies on the dollar.
This is a great way to find out what you like and don’t like before investing your money.
It’s much better to spend $10-$15 to rent some snowshoes that just don’t feel quite right compared to a few hundred dollars to get the gear you wish was different.
Some people go only once or twice a year and find it easier to rent instead of having their house filled with equipment lying around the house.
Try to practice getting up from the snow before you go. I know this sounds funny but can happen.
It also feels clumsy with snowshoes on especially with soft snow and several layers of clothes.
The best way to get back up is to take your hands out of the pole straps, roll yourself, and get your knees underneath you, if on a hill-pointed upslope then use your poles to stand back up.
Wear Sunglasses, sunscreen, and lip balm. It may not be the beach, but the sun sure can be bright in the winter, especially reflecting off the snow.
The wind can easily cause your lips to chap.
Is Snowshoeing Hard?
The first question I almost always get asked about snowshoeing is snowshoeing hard?
It's just like any other sport/activity, it can be easy and can be very hard. It depends on your physical abilities, experience, weather conditions, terrain, and snow conditions.
Other factors include the trail you take; how long, and elevation gain/loss.
I always suggest starting easy. Have fun on your first time on Snowshoes!
Take this time to get used to walking with snowshoes, learn techniques, and try different equipment to see what works best for you.
Make sure to start where you feel comfortable like your backyard or a local trail that is flat.
I suggest going when the snow is a little harder or has been around for a while.
We all hear how skiers love fresh powder but anyone who has hiked in snowshoes with a foot of fresh powder will tell you about the workout of their lives.
Get familiar with your snowshoe equipment
Snowshoes
Get familiar with your snowshoes and accessories available.
My snowshoes have a heel riser/heel lift on the heel which assists while going uphill. This prevents your foot from falling back down each time you step going uphill which makes you tired much easier.
They also have attachable 6” snowshoe floatation tails. This is a big help in soft snow.
Notice that your boots will fit in the bindings and heel strap. Make sure to know how to use them before heading out.
The Crampon and decking system is where you will get traction on the snow. They also help you from sliding downhill and sideways.
Most snowshoes have a metal tube around the outside of the snowshoe called the frame. MSR snowshoes are made of hard plastic material and don't need a frame to support the decking.
The decking and floatation tails give you support from falling through the snow.
The big advantage is being able to take off 6” of snowshoe in hard-packed trails that you don’t need the extra size. I can then go much faster and feel like a more natural step
The MSR Evo Accent Snowshoes are rated for 180 pounds. Add the 6" tails and they are now rated up to 250 pounds.
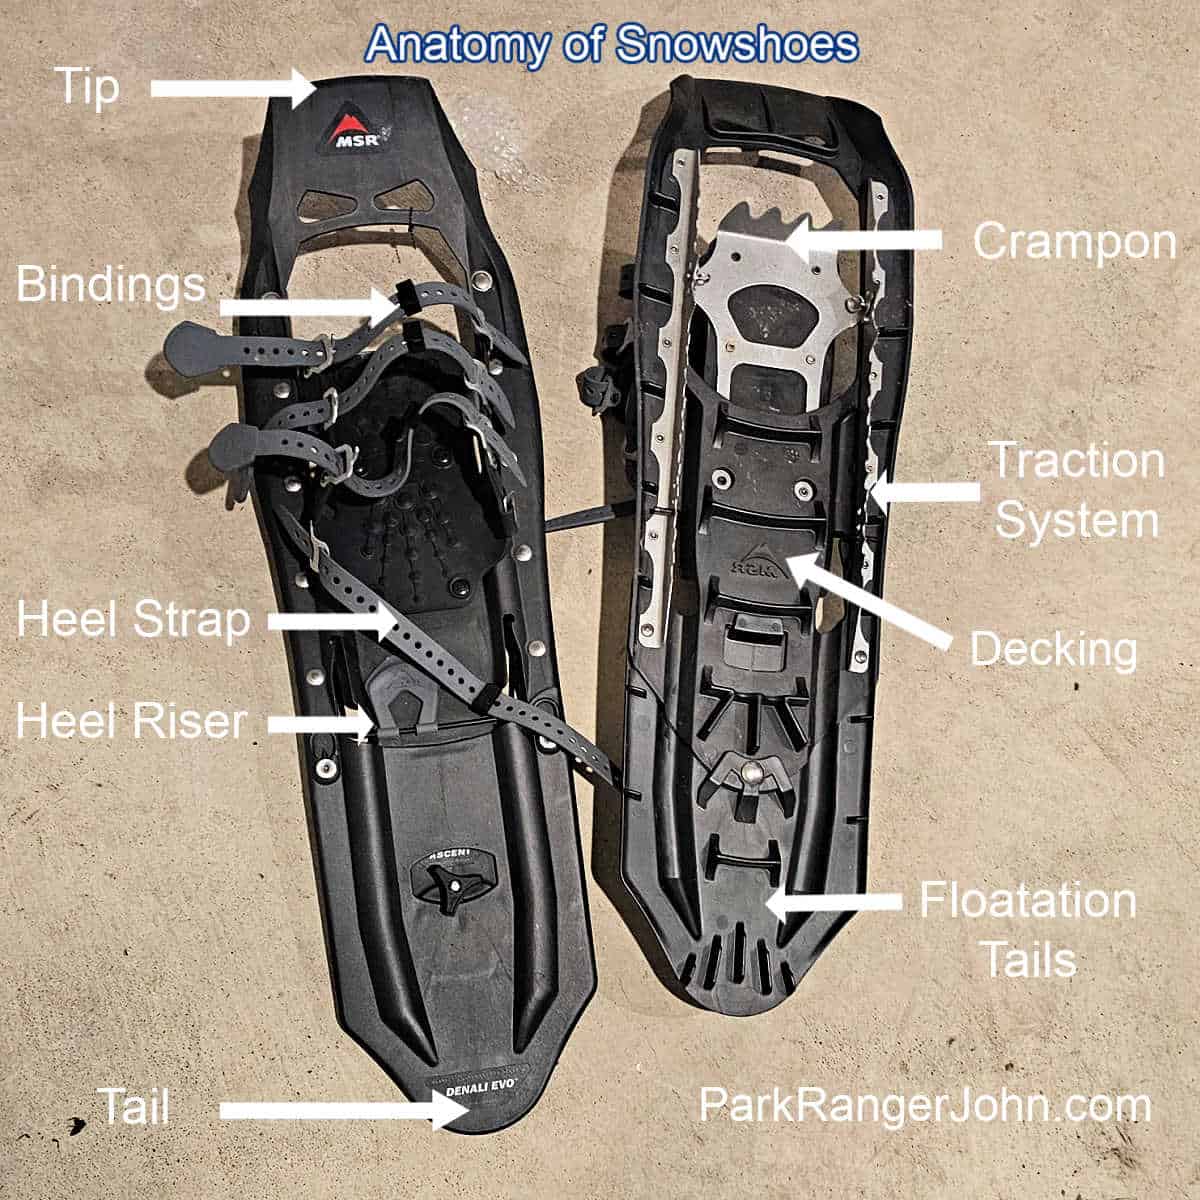
Photo Above Available on REI: MSR Evo Ascent Snowshoes with MSR 6" floatation Tails
Also available on Amazon: MSR Evo Ascent Snowshoes
Snowshoe sizing
Snowshoes will have a rating for how much weight they can hold. For men, I have seen everything from 180 pounds to up to 350 pounds!
I suggest learning how snowshoes attach to your boot before trying to put them on in the snow.
What to wear Snowshoeing
It is important to dress in Layers. The number one rule here is don’t wear cotton! Synthetics and wool stay warm even when wet.
The idea for layers is:
-
- A Base Layer that wicks away moisture and dries quickly
- Insulating Layer like polyester fleece retains heat when wet and breathes when you exercise
- Outer Layer Jacket and pants should be waterproof and able to fend off the wind.
Gloves: I personally always carry two pairs with me. The first is a fleece glove that does a great job keeping my hands warm. I also carry Ski Gloves too and work great if I need to double-layer.
Wear a hat: We lose the majority of our body heat from our heads, so this can be critical. Wool or synthetic blend Hat or balaclava retains heat and something with a brim can keep the sun out of your eyes on a bright sunny day.
socks: Again, don't wear the cotton socks you wear every day around the house. try wearing wool socks as wool will still keep you warm, even when they are wet. I know that my feet sweat so when I am going on a long trip I make sure to bring extra pairs of socks in my pack.
Snowshoe Boots
You can use your winter boots if you are the occasional snowshoer who does not hike very far.
They will keep your feet warm and dry but will get rather uncomfortable over any distance.
Many people prefer to wear their hiking boots. This is a great option if they are waterproof and insulated.
They will also provide the most comfort for someone used to wearing boots and make snowshoeing feel the most natural.
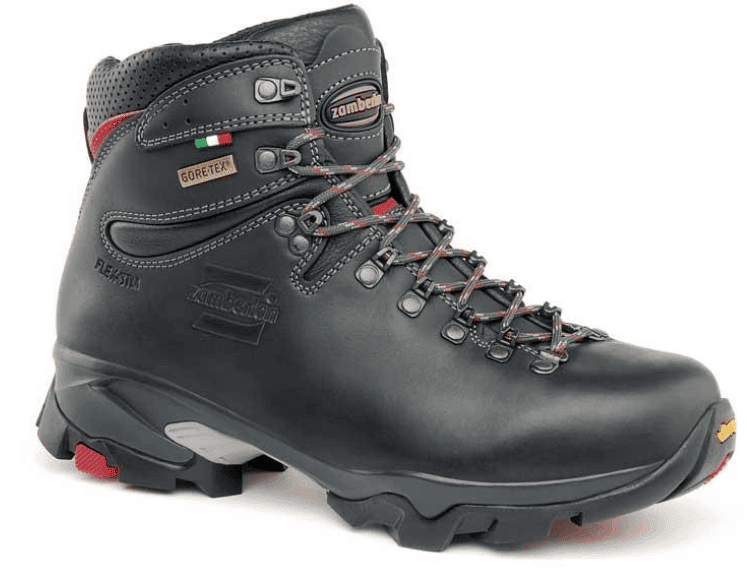
Anyone who knows me knows how much I love my Zamberlain Boots and have used them numerous times snowshoeing.
For large expeditions, I would suggest Alpine Mountaineering Boots, especially in rough and icy conditions. They have great protection from humidity and the cold but are not as comfortable as hiking boots.
Snowshoe Poles
Familiarize yourself with using hiking poles. Hiking poles help with balance and pulling yourself up from a fall.
The key to a proper fit in your arms should be to your side and your elbows at a ninety-degree angle for a proper fit.
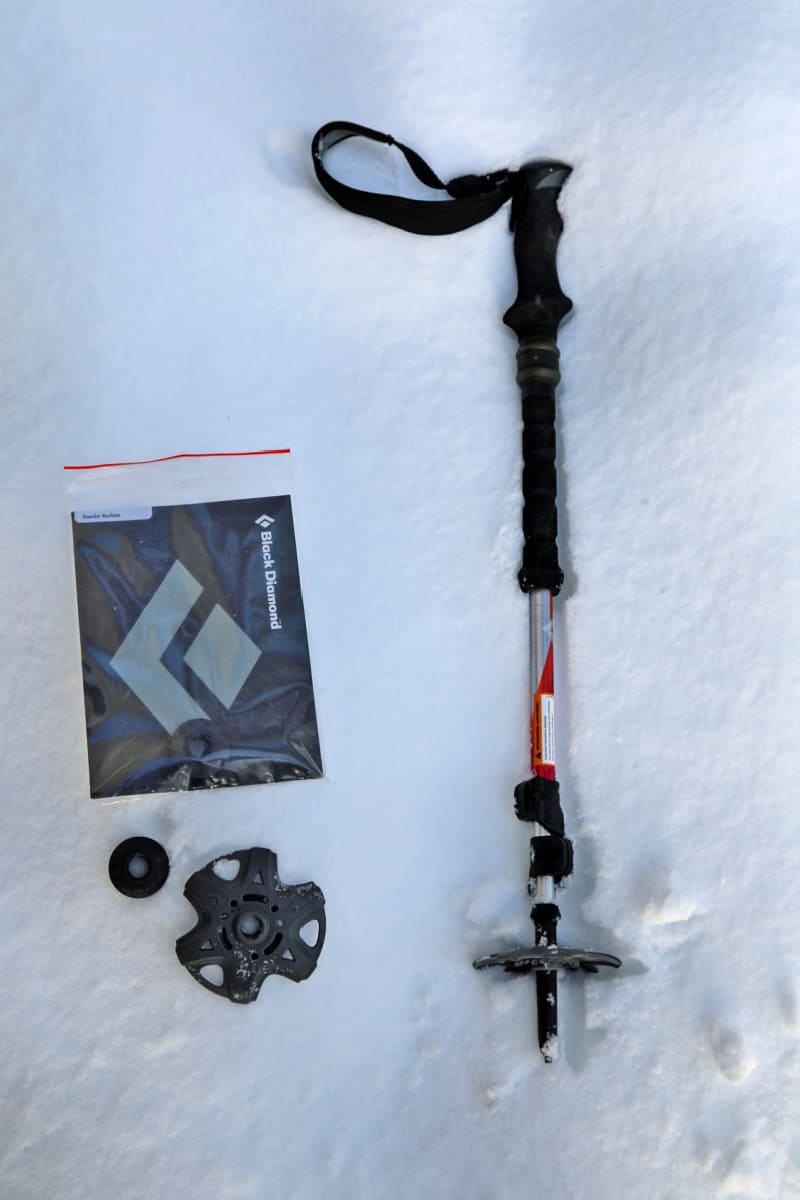
Photo Above Available on REI: Black Diamond Trekking poles with Black Diamond Powder Baskets
Also available on Amazon: Black Diamond trekking poles with Black Diamond Powder Baskets
Snowshoe Pole Tips
I prefer adjustable poles. This way you can shorten going uphill, lengthen for downhill, or adjust one shorter and one longer when traversing sideways on a slope.
Make sure to put powder baskets on trekking poles. This will help prevent the poles from punching through the snow and not providing support.
Snowshoe Pants
If you plan on spending much time outdoors in the winter I would suggest a good pair of snow pants.
Snow pants tend to be waterproof, and breathable, move moisture away from the body, and are designed for you to be active.
Some even have built-in gaiters that will attach to your jacket.
Snowshoe Gaiters
Why Gaiters? Snowshoe Gaiters are lightweight and breathable and keep snow from going up your pants legs and into your boots.
They also help protect your shoelaces so when you get back you don't have a massive snow/ice chunk that used to be your shoelaces.
Something this simple can be the difference between having a great day outdoors to coming home early with frozen feet.
Dogs and snowshoeing
Snowshoeing is an activity you can do with your dog. Before getting started, make sure to check on a few things first.
Always check to see if where you are going is pet-friendly and allows dogs on snowshoe trails.
Check the weather before heading out. Does your dog need a jacket to keep warm or are they adapted to the cold weather.
Always keep you and your pet hydrated.
Protect their paws from the snow and Ice. Remember some dogs are not meant for the snow and cold weather conditions.
If in doubt, check with a veterinarian before heading out.
First-time Snowshoeing
Make sure to check the weather forecast before going out on your adventure. Avoid poor weather conditions.
Knowing the weather will also help to know what to wear and, most importantly, when it is sunset.
Remember to stay Hydrated while snowshoeing.
Snowshoeing is a physical activity, especially in deep powder. Our muscles work best when they are hydrated. Staying hydrated also helps fight off hypothermia.
Don’t try to walk backward: If you decide to do so anyway, be proficient at picking yourself up from the snow.
Outdoor Safety
If there is anything you take away from this article, it is always your responsibility to keep yourself safe outdoors, especially in the winter!
The most significant risks to your safety are getting lost and cold-related illnesses like hypothermia and frostbite/frostnip.
Let someone know where you will go and when you plan to return.
Always carry the ten essentials for outdoor survival and practice the buddy system.
- Compass/map
- water
- food
- clothing
- sun protection
- knife
- matches
- fire starter
- first aid kit
- flashlight
In addition, it is vital to carry the winter ten essentials when snowshoeing:
- Shovel (Avalanche Rescue)
- Full-length insulated sleeping pad
- Stove and fuel (melt snow)
- Heat Packs
- Goggles and wool hat
- Gloves (waterproof/lined)
- Avalanche transceiver
- Avalanche Probe
- Reliable weather and avalanche forecasts
- Map, compass, GPS with extra batteries
I always suggest carrying a headlamp to have light while snowshoeing and not having to hold the flashlight. After all, it is easy to get surprised as it gets dark early in the winter.
Many people carry a GPS device with them. I love GPS, but I never go without a compass. I have found areas where GPS doesn't work or the batteries die (especially in the cold weather),
Avalanche Safety
Always know if you plan on going anywhere with a risk of avalanches.
Make sure to check with Avalanche.org for avalanche conditions, avalanche maps, avalanche basics, and a tutorial.
If you are going backcountry or to avalanche-prone areas, always carry an Avalanche Beacon, probe, and shovel.
Know what to do in case of an avalanche or if you are the one caught in an avalanche and how to use these tools.
National Parks with Snowshoeing Trails
Great News! National Park sites are abundant with snowshoeing trails for winter recreation. I have listed the parks that offer snowshoeing below. Now, there are no more excuses for the winter blues! It’s time to get some Vitamin D and enjoy the great outdoors!
Acadia National Park - Apostle Islands National Lakeshore - Bandelier National Monument - Bryce Canyon National Park - Catoctin Mountain Park - Cedar Breaks National Monument- Chesapeake & Ohio Canal National Historical Park - Crater Lake National Park - Craters of the Moon National Monument and Preserve - Cuyahoga Valley National Park - Delaware Water Gap National Recreation Area - Denali National Park and Preserve - Glacier National Park - Grand Teton National Park - Great Basin National Park - Great Sand Dunes National Park and Preserve - Ice Age National Scenic Trail - Indiana Dunes National Park - Katahdin Woods and Waters National Monument - Kenai Fjords National Park - Knife River Indian Villages National Historic Site - Lake Clark National Park and Preserve - Lassen Volcanic National Park - Lava Beds National Monument - Marsh - Billings - Rockefeller National Historic Park - Mesa Verde National Park - Mount Raininer National Park - North Country National Scenic Trail - Olympic National Park - Pictured Rocks National Lakeshore - Rocky Mountain National Park - Saratoga National Historical Park - Sequoia & Kings Canyon National Parks - Sleeping Bear Dunes National Lakeshore - Valles Cladere National Preserve - Voyageurs National Park - Wrangell-St. Elias National Park - Yellowstone National Park - Yosemite National Park
National Park Entrance Fees
Many national parks require an entry fee. Make sure to buy your annual park pass before heading out to spend time in our National Parks!
Learn more about National Park Passes for parks that have an entrance fee.
$80.00 - For the America the Beautiful/National Park Pass. The pass covers entrance fees to all US National Park Sites and over 2,000 Federal Recreation Fee Sites for an entire year and covers everyone in the car for per-vehicle sites and up to 4 adults for per-person sites.
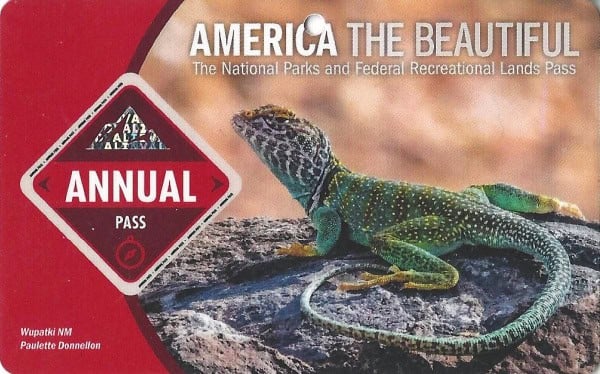
Buy your pass at this link, and REI will donate 10% of pass proceeds to the National Forest Foundation, National Park Foundation, and the U.S. Endowment for Forestry & Communities.
National Park Free Entrance Days -Mark your calendars with the five free entrance days the National Park Service offers annually.

Leave a Reply